Outlook 2013 lets you manage your schedule by creating appointments, which are then added to its calendar. These appointments can include lots of important details about your event, and can become an invaluable tool for managing your schedule. Our guide below will show you how to create a new appointment in Outlook 2013.
Creating a New Calendar Appointment in Outlook 2013
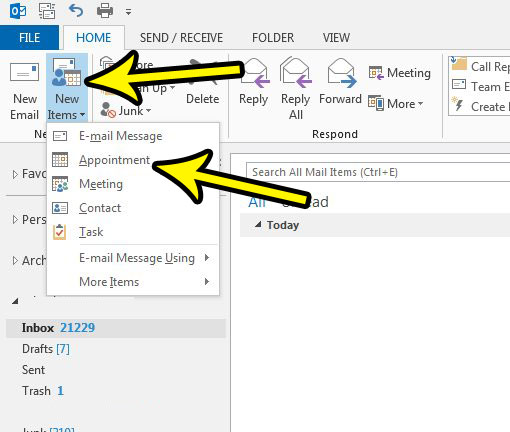
The steps in this article were performed in Microsoft Outlook 2013. When you finish this guide you will have added a new appointment to your calendar in Microsoft Outlook 2013. Step 1: Open Outlook 2013. Step 2: Click the New Items dropdown menu in the New section of the ribbon, then select the Appointment option.
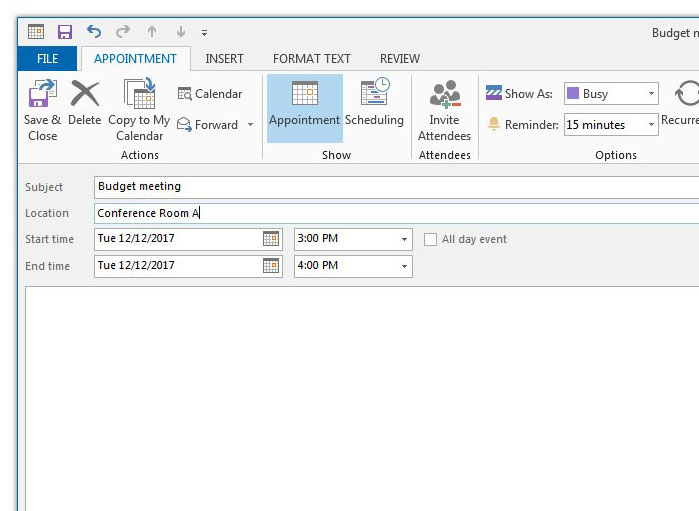
Step 3: Fill out the Subject and Time fields, then add any additional details that you want. For example, you can set a location for the appointment, or you can click the Show As button and set your status during that time. Additionally you can click the Invite Attendees button and invite other people to join your appointment. Once you have added all of the pertinent information, click the Save & Close button at the left of the ribbon.
Would you like it if Outlook checked for new messages more often than it does? Find out how to set the send and receive frequency in Outlook 2013 and get the application to check your email server for new messages as often as you want. He specializes in writing content about iPhones, Android devices, Microsoft Office, and many other popular applications and devices. Read his full bio here.